Thursday, February 28, 2013

More Jasper iReport Tips and Tricks

I've been working with iReport for about a month now and will share a few more tricks I have found. Today I will cover:

  • Alternating row color or style
  • Date calculation - such as adding days
  • Title case
  • Setting the maximum number of rows - useful for html report as they can crash the browser
  • Html output - breaking words and cell padding

Alternating Row Style


I came across a few posts which talk about drawing rectangles to do this, however I found the best way is with Conditional Styles. This also work with html reports, unlike some other proposed solutions I tried.

In iReport simply right click on Style > Add > Style. Name the style AltBackgrd. Now right click on the new style and select Add Conditional Style. Under Condition Expression enter:
$V{REPORT_COUNT}.intValue() % 2 == 0


Now check Opaque and set the Backcolor color as needed, I'm using [234,234,234].

The xml definition of the style will look like this:

 <style name="AltBackgrd" fontName="DejaVu Sans" fontSize="10">
  <conditionalStyle>
   <conditionExpression><![CDATA[$V{REPORT_COUNT}.intValue() % 2 == 0]]></conditionExpression>
   <style mode="Opaque" backcolor="#EAEAEA"/>
  </conditionalStyle>
 </style>
Next under the Detail Band, select all the fields and set the Style to AltBackgrd. Your report should look something like this:


Date Calculation


I've also had to do some date calculation. The sql returned a set of dates indicating the start/end date of a financial week, I was then required to calculate the month end date from todays date. There is a nice post out there suggesting this can be done with a single statement which involved initializing a Calendar object, setting the date and then adding to it. In practice I was unable to get this to work. I then went down the simple route of adding hours as follows:
"Month End " + new SimpleDateFormat("MM/dd/yyyy").format(new Date($F{WEEK_END_DATE}.getTime() + ($V{oneDay} * 7 * ($F{ACCT_WEEKS_IN_MONTH}.intValue() - $V{AcctMonth_COUNT}))))

Where does oneDay come from you ask? Well that is just a Variable I defined, with the following Variable Expression:
24L*60*60*1000

Now I can easily do date calculations. This is sufficient for my purposes however do be careful around daylight saving times with this technique.

Title Case


Although this is a fairly obvious solution I though it would be worth mentioning to get fields in Title Case you can simply do this:
org.apache.commons.lang.WordUtils.capitalizeFully($F{MANAGER_NAME})
This of course relies on the fact that you have Apache WordUtils on your classpath ... don't you, of course you do.

Maximum Number of Rows


This was a very important feature. I was constantly getting bug requests because the screen would lock up or Chrome would crash, controls were sluggish and unresponsive, and why? Well because you're trying to view 50k rows in your browser. Now this solution was only needed for html as we did not want to limit the rows for pdf or csv. To do this I used the REPORT_MAX_COUNT parameter.

This is configured inside my controller as follows:
 if (format == null || "HTML".equalsIgnoreCase(format)) {
  mav.addObject("format", "html");
  mav.addObject(JRParameter.REPORT_MAX_COUNT, report.getMaxRowsHtml()); //Row limit only needed for Html
 } else {
  mav.addObject("format", format);
  if ("PDF".equalsIgnoreCase(format)) {
   mav.addObject(JRParameter.IS_IGNORE_PAGINATION, Boolean.FALSE); //Paging is only needed for pdf
  }
 }
The report object you see is simply the model representation of a Report table we use which lists all the reports and maxRowsHtml is one of the columns in the table which contains the per report html row limit. Another thing about our application is that the jrxml files are directly uploaded into the database as a clob. They are parsed, and the maxRowsHtml property is read from the jrxml. It is simply defined in the jrxml as a report property like this:
<property name="maxRowsHtml" value="2000"/>

The other piece of this was indicating to the user that there is a row limit enforced on the report, this would only be displayed on html. You can see it as (Max 2000). This can be achieved with a Text Field in iReport. Give it the following Text Field Expression:
"Rows: " + $V{REPORT_COUNT} + ($P{REPORT_MAX_COUNT} == null ? "" : " (Max " + $P{REPORT_MAX_COUNT} + ")")

Html Output


Finally I'll touch on how I prettied up the html output. When I first ran my reports they looked like this:


The lines were too tall and there was no gap between the right aligned Request Amt and the left aligned Reason. With one line of jquery, I was able to reduce the line height and put some padding between cells, this is called after the html is set on the report container through an ajax call:
$("#reportContainer table tr p").css({ 'margin' : '5px 3px', 'overflow' : 'visible'});
The other problem I had was very long descriptions were not wrapping at all, I fixed that with css:
table td
{
    word-break: break-all;
    word-wrap: break-word;
}

The final report looks something like this:


Monday, January 28, 2013

Jasper iReport with Java, Spring and Tomcat

I'm going to jump over to the Jasper reporting tools which I have been working with on my latest project. I had a hard time finding good documentation. I did find some helpful links which I'll post here, I also did a lot of trial and error and will talk about my experiences and what I've discovered. Topics I'll cover include:
  • iReport dynamic sql syntax.
  • Enable iReport sql logging to external file.
  • Creating and registering (ireport and web app) your own custom $X functions.
  • Extending the Spring JasperReportsMultiFormatView to provide dynamic report compilation when the jrxml file is changed on disk, as well as setting the output filename.
  • Helpful MultiFormatView properties for controlling the output.
Ok so lets start with the dynamic sql syntax, I had a hard time finding good docs for this even the Ultimate guide barely touches this. I do recommend this guide for the built-in functions. So in this example the sql output is dependent on the value of the parameter passed in.

Start by defining the input parameter:
<parameter name="lastName" class="java.lang.String">
 <parameterDescription><![CDATA[Last Name]]></parameterDescription>
</parameter>
You will also need the dynamic query like this:
<parameter name="lastNameQuery" class="java.lang.String" isForPrompting="false">
 <defaultValueExpression><![CDATA[($P{lastName} == null ? "" : " AND usr.last_name = " +$P{lastName} +" ")]]></defaultValueExpression>
</parameter>
This reads: If the optional input filter (last name) is not provided, don't include it in the sql clause, else insert the sql given here. This uses the shorthand if notation (exp ? do1 : do2) it also passes in the value of the parameter with the $P{lastName} syntax.

The last part seen below is just to place the dynamic query param in the sql (Note the exclamation mark indicates this is part of the sql query to be executed):
WHERE
   ...
    $P!{lastNameQuery}
   ...
ORDER BY $P!{sortColumn} $P!{sortDirection}
Here is an example of using this technique for dynamic sorting:
<parameter name="sortColumn" class="java.lang.String" isForPrompting="false">
 <defaultValueExpression><![CDATA[" usr.id "]]></defaultValueExpression>
</parameter>
<parameter name="sortDirection" class="java.lang.String" isForPrompting="false">
 <defaultValueExpression><![CDATA[" ASC "]]></defaultValueExpression>
</parameter>
Some of these queries can get quite complicated so it is important to be able to view the sql output, unfortunately there is no easy way to do this in iReport. However here are the instruction you should follow to enable this.

In my reports I had a lot of optional filters often around 10, and I got tired of using 2 parameters each time to create the dynamic sql. I then looked into creating my own $X{...} functions. The first one I created was similar to the $X{EQUAL;col;param} built-in function, but if the param was null, then it would not be included in the sql, as opposed to the built-in functionality which would include the 'IS NULL' clause. I called it OPT_EQUAL and it is used like this:
AND $X{OPT_EQUAL; usr.last_name; lastName}

To write this I had to first write a JRSqlOptEqualClause.java like this, which on null includes the truism 0 = 0:
 
public class JRSqlOptEqualClause implements JRClauseFunction {

protected static final int POSITION_CLAUSE_ID = 0;
protected static final int POSITION_DB_COLUMN = 1;
protected static final int POSITION_PARAMETER = 2;

protected static final String CLAUSE_TRUISM = "0 = 0";

protected static final String OPERATOR_EQUAL = "=";

protected static final JRSqlOptEqualClause SINGLETON = new JRSqlOptEqualClause();

/**
 * Returns the singleton function instance.
 *
 * @return the singleton function instance
 */
public static JRSqlOptEqualClause instance() {
 return SINGLETON;
}

public void apply(JRClauseTokens clauseTokens, JRQueryClauseContext queryContext) {
  String clauseId = clauseTokens.getToken(POSITION_CLAUSE_ID);
  String col = clauseTokens.getToken(POSITION_DB_COLUMN);
  String param = clauseTokens.getToken(POSITION_PARAMETER);

  if (clauseId == null) {
   throw new JRRuntimeException("Missing clause name token");
  }

  if (col == null) {
   throw new JRRuntimeException("SQL OPT_EQUAL clause missing DB column token");
  }

  if (param == null) {
   throw new JRRuntimeException("SQL OPT_EQUAL clause missing parameter token");
  }

  Object paramValue = queryContext.getValueParameter(param).getValue();
  if (paramValue == null) {
   handleNullValue(queryContext);
  } else {
   StringBuffer sbuffer = queryContext.queryBuffer();
   sbuffer.append(col);
   sbuffer.append(' ');
   handleEqualOperator(sbuffer, param, queryContext);
  }
 }

 /**
  * Generate a SQL clause that will always evaluate to true (e.g. '0 = 0').
  *
  * @param queryContext the query context
  */
 protected void handleNullValue(JRQueryClauseContext queryContext) {
  queryContext.queryBuffer().append(CLAUSE_TRUISM);
 }
}
The next step was the RegistryFactory for this extension to be picked up:
public class CustomExtensionsRegistryFactory implements ExtensionsRegistryFactory {

 public static final String CLAUSE_ID_OPT_EQUAL = "OPT_EQUAL";
 public static final String CLAUSE_ID_OPT_LIKE_OR = "OPT_LIKE_OR";
 public static final String CLAUSE_ID_OPT_EQUAL_OR = "OPT_EQUAL_OR";

 private static ListExtensionsRegistry registry;

 static {
  StandardSingleQueryClauseFunctionBundle functions = new StandardSingleQueryClauseFunctionBundle(
    JRJdbcQueryExecuter.CANONICAL_LANGUAGE);

  StandardSingleQueryParameterTypesClauseFunctionBundle typesFunctions =
    new StandardSingleQueryParameterTypesClauseFunctionBundle(JRJdbcQueryExecuter.CANONICAL_LANGUAGE);

  functions.addFunction(CLAUSE_ID_OPT_EQUAL,
    new ParameterTypeSelectorClauseFunction(JRSqlOptEqualClause.POSITION_PARAMETER));
  typesFunctions.setFunctions(CLAUSE_ID_OPT_EQUAL,
    new StandardParameterTypesClauseFunction(JRSqlOptEqualClause.instance(), Object.class));
  functions.addFunction(CLAUSE_ID_OPT_LIKE_OR,
    new ParameterTypeSelectorClauseFunction(JRSqlOptLikeOrClause.POSITION_PARAMETER));
  typesFunctions.setFunctions(CLAUSE_ID_OPT_LIKE_OR,
    new StandardParameterTypesClauseFunction(JRSqlOptLikeOrClause.instance(), Object.class));
  functions.addFunction(CLAUSE_ID_OPT_EQUAL_OR,
    new ParameterTypeSelectorClauseFunction(JRSqlOptEqualOrClause.POSITION_PARAMETER));
  typesFunctions.setFunctions(CLAUSE_ID_OPT_EQUAL_OR,
    new StandardParameterTypesClauseFunction(JRSqlOptEqualOrClause.instance(), Object.class));

  registry = new ListExtensionsRegistry();
  registry.add(QueryClauseFunctionBundle.class, functions);
  registry.add(ParameterTypesClauseFunctionBundle.class, typesFunctions);
 }

 @Override
 public ExtensionsRegistry createRegistry(String registryId, JRPropertiesMap properties) {
  return registry;
 }
}
Finally in the scr root folder i needed a file called jasperreports_extension.properties which hooks in the extension and registers the class, it only needs one line:
net.sf.jasperreports.extension.registry.factory.sql.clause.functions.custom=com.myapp.report.jasperext.CustomExtensionsRegistryFactory
If you have trouble I would first recommend you first check that the new classes are registered by debugging the class net.sf.jasperreports.extensionsDefaultExtensionsRegistry method: loadRegistries()

Once that is ok if your extension still isn't called I'd check net.sf.jasperreports.engine.query.JRAbstractQueryExecuter method: resolveFunction(String id) and check you function is found. 

Next to get this working in iReport you must package the classes into a jar which I've included here then register it for use in iReport simply by adding it to the classpath under: tools > options > classpath > add jar

One very cool thing I found is the delimiter used in the report can be either a comma, a semi-colon or a pipe. This is very useful for more complicated $X functions such as this:
AND $X{IN;nvl(decode(type_code, 999, null, type_code), other_type_code);typeCode}
If you used a comma delimiter this would not be parsed correctly, but with the semi-colon it works just fine.

Another problem I had was the JasperReportsMultiFormatView, this did not dynamically compile my report when the jrxml file had changes without bouncing the app server. Since we were regularly uploading new version of report we needed dynamic compilation. I achieved this by creating my own DynamicJasperReportsMultiFormatView.java shown here:
import java.text.DateFormat;
import java.text.SimpleDateFormat;
import java.util.Calendar;
import java.util.Properties;

import net.sf.jasperreports.engine.JasperReport;

import org.apache.log4j.Logger;
import org.springframework.web.servlet.view.jasperreports.JasperReportsMultiFormatView;

public class DynamicJasperReportsMultiFormatView extends JasperReportsMultiFormatView {

 private static final Logger LOG = Logger.getLogger(DynamicJasperReportsMultiFormatView.class);

 private static final String DATE_FORMAT = "MM-dd-yyyy";

 private static final String FILE_EXT_CSV = "csv";
 private static final String FILE_EXT_EXCEL = "xls";
 private static final String FILE_EXT_HTML = "html";
 private static final String FILE_EXT_PDF = "pdf";

 /**
  * The JasperReport that is used to render the view.
  */
 private JasperReport jasperReport;

 /**
  * The last modified time of the jrxml resource file, used to force compilation.
  */
 private long jrxmlTimestamp;

 @Override
 protected void onInit() {
  jasperReport = super.getReport();
  this.setContentDispositionHeader(jasperReport.getName());
  try {
   String url = getUrl();
   if (url != null) {
    jrxmlTimestamp = getApplicationContext().getResource(url).getFile().lastModified();
   }
  } catch (Exception e) {
   e = null;
  }
 }

 @Override
 protected JasperReport getReport() {
  if (this.isDirty()) {
   LOG.info("Forcing recompilation of jasper report as the jrxml has changed");
   this.jasperReport = this.loadReport();
  }
  return this.jasperReport;
 }

 /**
  * Determines if the jrxml file is dirty by checking its timestamp.
  *
  * @return true to force recompilation because the report xml has changed, false otherwise
  */
 private boolean isDirty() {
  long curTimestamp = 0L;
  try {
   String url = getUrl();
   if (url != null) {
    curTimestamp = getApplicationContext().getResource(url).getFile().lastModified();
    if (curTimestamp > jrxmlTimestamp) {
     jrxmlTimestamp = curTimestamp;
     return true;
    }
   }
  } catch (Exception e) {
   e = null;
  }
  return false;
 }

 /**
  * This will configure the content disposition mapping with the report name.
  */
 protected void setContentDispositionHeader(String reportName) {
  Properties mappings = new Properties();
  DateFormat df = new SimpleDateFormat(DATE_FORMAT);
  String reportDate = df.format(Calendar.getInstance().getTime());
  String contentDisp = "inline; filename=" + reportName + "_" + reportDate + ".";
  mappings.put(FILE_EXT_CSV, contentDisp + FILE_EXT_CSV);
  mappings.put(FILE_EXT_HTML, contentDisp + FILE_EXT_HTML);
  mappings.put(FILE_EXT_PDF, contentDisp + FILE_EXT_PDF);
  mappings.put(FILE_EXT_EXCEL, contentDisp + FILE_EXT_EXCEL);
  setContentDispositionMappings(mappings);
 }
}
As you can see the class checks when the report timestamp and recompiles if needed. It also configures the file name, with the name of the report and a date. This is configured in the app context as usual:
  <bean id="viewResolver" class="org.springframework.web.servlet.view.jasperreports.JasperReportsViewResolver">
  <property name="prefix">
   <value>WEB-INF/reports/</value>
  </property>
  <property name="viewClass">
   <value>com.myapp.report.DynamicJasperReportsMultiFormatView</value>
  </property>
  <property name="suffix">
   <value>.jrxml</value>
  </property>
  <property name="jdbcDataSource">
   <ref bean="testDataSource" />
  </property>
  <property name="exporterParameters">
   <map>
    <entry key="net.sf.jasperreports.engine.export.JRHtmlExporterParameter.IS_USING_IMAGES_TO_ALIGN" value="false"/>
    <entry key="net.sf.jasperreports.engine.export.JRHtmlExporterParameter.SIZE_UNIT" value="pt"/>
    <entry key="net.sf.jasperreports.engine.export.JRHtmlExporterParameter.IGNORE_PAGE_MARGINS" value="true"/>
    
    <entry key="net.sf.jasperreports.engine.export.JRXlsExporterParameter.IS_REMOVE_EMPTY_SPACE_BETWEEN_COLUMNS" value="true"/>
    <entry key="net.sf.jasperreports.engine.export.JRXlsExporterParameter.IS_REMOVE_EMPTY_SPACE_BETWEEN_ROWS" value="true"/>
    <entry key="net.sf.jasperreports.engine.export.JRXlsExporterParameter.IS_DETECT_CELL_TYPE" value="true"/>
    <entry key="net.sf.jasperreports.engine.export.JRXlsExporterParameter.IS_COLLAPSE_ROW_SPAN" value="true"/>
   </map>
  </property> 
  <property name="headers">
   <map>
    <entry key="Content-Disposition" value="inline; filename='report'"/>
   </map>
  </property> 
 </bean>
I'll also talk about some of the export parameters used here:
  • SIZE_UNIT - this is helpful to provide consistent text size across Excel and html output, I found the html text was very small (default pixels) until I changed this.
  • IS_COLLAPSE_ROW_SPAN - this will remove cells that span multiple rows in the Excel output making sorting difficult.
  • IS_DETECT_CELL_TYPE - this will let Excel automatically set the type of units like currency or date and seems to work quite well.

I've covered a lot on Jasper Reports today, please ask comments if I went too quick and you need clarification on anything or more detailed examples.

Update March 5, 2013
I have updated the custom function jar with some new tools, it now contains the following procedures, documentation on usage and examples is contained within the jar.

  • X{OPT_EQUALS, column, param}
  • X{OPT_LIKE_OR, column1, column2, param}
  • X{OPT_EQUAL_OR, column1, column2, param}
  • X{IS_EQUAL, sql, compareValue, param}
  • X{OPT_NAME_CODE, sql1, sql2, param}

Friday, December 28, 2012

Jquery JTable with Java and Spring

I just finished a new project working with Jtable to create some crud tables. I was pretty happy with the tool but made numerous extension to the framework which I'll look at today, I'll also provide some java spring mvc examples which I was unable to find online as all the documentation was for asp.net.

Why don't I start with a list of the features I've added:

  • Client side sorting with tablesorter
  • New hidden-edit and hidden-create types
  • Custom up/down arrows for sorting
  • Date Format fix for a date that is just a number ie: doesn't have format Date(1320259705710)
  • Removed cancel buttons so you have to close the dialog with the X in the top corner
  • Use an add record button that is outside the table (default is in the footer row)
  • Default null date to empty string rather than today
  • Loading dialog is optional
  • Option to show error message in table row rather than in popup
  • Added expand contract buttons for the child table
  • Added date time formatting (default is only date)
  • Allow hidden header row (handy for child tables)
  • Added grouping of data by a column (data must be sorted by the group)

Lets start by looking at some of the java code in the spring controller, and then move on to the jtable extensions:

This is the search method:
 
@RequestMapping(value = "/custSearch.do", method = RequestMethod.POST)
@ResponseBody
public JsonJtableResponse search(@ModelAttribute CustSearch searchFilters) {
 //check all search filters are not empty
 if (searchFilters == null || searchFilters.isEmpty()) {
  return new JsonJtableResponse().error("At least one filter must be specified");
 }

 List customerList = customerService.geCustByFilter(searchFilters);

 return new JsonJtableResponse().ok(customerList);
}
Next we have the insert new record:
 
@RequestMapping(value = "/insertCust.do", method = RequestMethod.POST)
@ResponseBody
public JsonJtableResponse insert(@ModelAttribute Customer customer, BindingResult result) {
 if (result.hasErrors()) {
  return new JsonJtableResponse().error(result.getAllErrors());
 }
 try {
  Customer newCust = customerService.insertCust(customer);
  return new JsonJtableResponse().ok(newCust);
 } catch (Exception e) {
  return new JsonJtableResponse().error(e.getMessage());
 }
}
Then the update record:
@RequestMapping(value = "/updateCust.do", method = RequestMethod.POST)
@ResponseBody
public JsonJtableResponse update(@ModelAttribute Customer customer, BindingResult result) {
 if (result.hasErrors()) {
  return new JsonJtableResponse().error(result.getAllErrors());
 }
 try {
  customerService.updateCust(customer);
  return new JsonJtableResponse().ok();
 } catch (Exception e) {
  return new JsonJtableResponse().error(e.getMessage());
 }
}
Finally the delete:
@RequestMapping(value = "/deleteCust.do", method = RequestMethod.POST)
@ResponseBody
public JsonJtableResponse delete(@RequestParam Integer custId) {
 try {
  customerService.deleteCust(custId);
  return new JsonJtableResponse().ok();
 } catch (Exception e) {
  return new JsonJtableResponse().error(e.getMessage());
 }
}
You've probably noticed that I've wrapped the jtable api with the JsonJtableResponse object. You can download this handy helper class here.

 As for the jsp, all you really need is a div for the jtable:
<!-- Jtable Dependencies -->
<link rel="stylesheet" type="text/css" href="/css/jquery/jtable.css"/>
<link rel="stylesheet" type="text/css" href="/css/jquery/validationEngine.jquery.css"/>
<script type="text/javascript" src="/scripts/jquery.jtable.js"></script>
<script type="text/javascript" src="/scripts/jquery.validationEngine.js"></script>
<script type="text/javascript" src="/scripts/jquery.validationEngine-en.js"></script>
<script type="text/javascript" src="/scripts/jquery.tablesorter.min.js"></script>

<script type="text/javascript" src="/scripts/manageCust.js"></script>

<%-- Built with jtable --%>
<div id="custSearchResultsDiv" class="searchResultsDiv">
 <div style="overflow: hidden; margin-top: 5px; margin-bottom: 5px;">
  <div class="jtable-rowCount"></div>
 </div>
 <div class="buttonDiv">
  <input id="custInsertButton" type="button" class="but searchButton jtable-add-record" value="Insert New Customer"/>
 </div>
</div>
The real work is done in the manageCust.js this is where the table structure is defined and the controller urls get configured:
$(document).ready(function() {
 
 $("#custSearchButton").click(function() {
  initResultsTable();
 });
 
 //setup the jtable that will display the results
    $('#custSearchResultsDiv').jtable({
        paging: false,
        sorting: false, //this is an ajax sort
        clientSort: true, //this needs jquery.tablesorter.min.js
        columnResizable: false,
        columnSelectable: false,
        selecting: false,
        multiselect: false,
        selectingCheckboxes: false,
        
        actions: {
            listAction: baseUrl + '/admin/searchCust.do',
            createAction: baseUrl + '/admin/insertCust.do',
            updateAction: baseUrl + '/admin/updateCust.do',
            deleteAction: baseUrl + '/admin/deleteCust.do'
        },
        fields: {
         custId: {
                key: true,
                create: false,
                edit: false,
                list: false
            },
            name: {
                title: 'Full Name',
                width: '30%',
                inputClass: 'validate[required]',
                type: 'hidden-edit' 
            },
            birthYear: {
                title: 'Birth Year',
                width: '15%'
            },
            employer: {
                title: 'Employer',
                width: '25%'
            },
            infoAsOfDate: {
                title: 'As Of Date',
                type: 'date',
                width: '15%',
            },
            disabled: {
                title: 'Status',
                type: 'checkbox',
                values: { 'false': 'Active', 'true': 'Disabled' },
                defaultValue: 'false',
                width: '15%',
                listClass: 'center'
            }
        },
        //Initialize validation logic when a form is created
        formCreated: function (event, data) {
            data.form.validationEngine();
        },
        //Validate form when it is being submitted
        formSubmitting: function (event, data) {
            return data.form.validationEngine('validate');
        },
        //Dispose validation logic when form is closed
        formClosed: function (event, data) {
            data.form.validationEngine('hide');
            data.form.validationEngine('detach');
        }
    });
    
});

function initResultsTable() {
 
 //perform the search and passin the filters - filters will be bound to the CustomerSearch bean
    $('#custSearchResultsDiv').jtable('load', {
     birthYear: $("#birthYear").val(),
     employer: $("#employer").val()
    }, 
    function() { //load complete
     //alert('table data loaded');
    });
    
}

Above you can see some of the extension I've made; type: 'hidden-edit' allows the Customer Name to be entered when you insert a new customer, but the name is not able to be updated when editing.

I've also added clientSort: true, this allows the data to be sorted on the client side using table sorter which must be in the jsp.

As I'm running out of time I'll just attach my enhanced version of jtable as well as the css I've been using:
Original Jtable (handy to do a compare and extract the new features you need)
My Enhanced Jtable
My new Jtable css

Feel free to use and edit these as needed. I will go into more detail of my enhancements in a future post.


Thursday, November 1, 2012

Automated Remote WAS Deployment with Ant and Thin Client

This is a follow up to my previous struggle working with automated WAS deployments. The next goal was to get the deployment running on our Windows 7 build server which did not have WAS installed and I had no intention of installing that 3GB download just for some simple wsadmin tasks.

In my previous post I had examples of the ant task deployments using ws_ant. But I soon found that this is only possible with the full WAS install. I'll include the scripts below for anyone that might have WAS installed anyway and want to go down this route, the script is tested and working:

 <!-- Project properties -->
 <property name="earname" value="myapp-qa-test" />
 <property name="appname" value="myapp-test" />
 <property name="build.dir" location="build" />

 <!-- was properties -->
 <property name="host" value="myhost.ibm.com" />
 <property name="conntype" value="SOAP" />
 <property name="port" value="1107" />
 <property name="user" value="--username--" />
 <property name="password" value="--password--" />
 <property name="node" value="AppSrv01" />
 <property name="server" value="server1" />
 <property name="virtualHost" value="test_host" />
 <property name="webAppDisplayName" value="myapp" />
 
 <!-- These ant tasks require the full WAS install to use with a default profile --> 
 
 <!-- Was Ant task definitions -->
 <taskdef name="wsStartApplication" classname="com.ibm.websphere.ant.tasks.StartApplication" />
 <taskdef name="wsStopApplication" classname="com.ibm.websphere.ant.tasks.StopApplication" />
 <taskdef name="wsStartServer" classname="com.ibm.websphere.ant.tasks.StartServer" />
 <taskdef name="wsStopServer" classname="com.ibm.websphere.ant.tasks.StopServer" />
 <taskdef name="wsInstallApp" classname="com.ibm.websphere.ant.tasks.InstallApplication" />
 <taskdef name="wsUninstallApp" classname="com.ibm.websphere.ant.tasks.UninstallApplication" />
 <taskdef name="wsListApps" classname="com.ibm.websphere.ant.tasks.ListApplications" />

 <target name="listApps">
  <wsListApps host="${host}" port="${port}" conntype="${conntype}"
   user="${user}" password="${password}" failonerror="true"/>
 </target>
 
 <target name="deploy" description="Deoploy the ear to stage">
  <wsInstallApp ear="${build.dir}/${earname}.ear" options="-appname ${appname}" 
   host="${host}" port="${port}" conntype="${conntype}"
   user="${user}" password="${password}" failonerror="true"/>
 </target>

 <target name="undeploy">
  <wsUninstallApp application="${appname}"
   host="${host}" port="${port}" conntype="${conntype}" user="${user}" password="${password}" 
   failonerror="true" />
 </target>

 <target name="startApplication">
  <wsStartApplication application="${appname}" 
   host="${host}" port="${port}" conntype="${conntype}" user="${user}" password="${password}" 
   server="${server}" node="${node}"/>
 </target>

 <target name="stopApplication">
  <wsStopApplication application="${appname}"
   host="${host}" port="${port}" conntype="${conntype}" user="${user}" password="${password}" 
   server="${server}" node="${node}"/>
 </target>

 <target name="update" >
     <wsInstallApp ear="${build.dir}\${earname}.ear" options="-update -appname ${appname} -MapWebModToVH {{${webAppDisplayName} ${appname}.war,WEB-INF/web.xml ${virtualHost}}}" 
      host="${host}" port="${port}" conntype="${conntype}" user="${user}" password="${password}" 
      failonerror="true"/>  
 </target>

These scripts will work assuming ws_ant is working correctly. One interesting thing you may notice I have removed the start/stop server targets from here this is because according to the documentation:

The wsStopServer task enables you to stop a standalone server instance. This is not used to stop a server controlled by DeploymentManager. Therefore, this task is useful for the Base Application Server, and to stop the Node Agent and/or DeploymentManager. If you wish to stop a server managed by the Deployment Manager, use the wsadmin task to execute a scripting command. The structure of the wsStopServer task is shown below

So even if ws_ant could work with the WAS Thin Client I would have no way to bounce the application server anyway. To be thorough I asked IBM if these targets could be used with the WAS Thin Client and this was the response:

The ws_ant implementation depends on having a valid profile in order to correctly set up class loading. Currently, there is no way around this other than to install an instance of WAS on the build machine and create a default profile, or to drive the application install from one of the servers already hosting WAS. Thus, can you temporarily install WAS on that machine, perhaps try WAS Developers Edition, which is free.

If you try using ws_ant with the Thin Client this is the error I received:

WCMD0002E: Command "ws_ant.bat" requires a profile. No default profile exists and a profile name was not specified. Ensure that a default profile exists or use the -profileName parameter to specify the name of an existing profile.

I was not impressed with this response but I knew I could get the Thin Client working and call wsadmin tasks from ant using the exec command. So let look at setting up the thin client.

The latest documentation is here, this will help you get the thin client set up, unfortunately is assumes you have access to a full WAS install and is not available in a small download package.

Try to follow the Procedure section as best you can, It basically involves copying a buch of config and jar files to C:\WASThinClient, you should also copy the Java jre to this folder.

My directory structure looked like this (Note I have not included all the java files but you get the idea):

C:\WASThinClient
|   com.ibm.ws.admin.client_8.5.0.jar
|   com.ibm.ws.security.crypto.jar
|   wsadmin.bat
|   
----etc
|       key.p12
|       trust.p12
|       
----java ...
|   ----bin
|   ----docs
|   ----include
|   ----jre
|   ----lib
|   |---properties
|               
|---properties
        ipc.client.props
        sas.client.props
        soap.client.props
        ssl.client.props
        wsjaas_client.conf
The only interesting part of this is the wsadmin.bat file, which I have included here, if you use the wsadmin from the IBM site you will have problems with new line characters and misc bugs, I would highly recommend starting with the file I provided and modifying the paths as needed. Remember to remove the txt extension as I was unable to upload a bat file.

Once you get to this stage you will want to test that you can call wsadmin tasks directly in the command prompt, so open a prompt at your thin client directory and runs some simple commands:

wsadmin -c "$AdminControl getNode" -host myhost.ibm.com -conntype soap -port 5112 -user <enteruserid> -password <enterpassword>
->AppSrv01
wsadmin -c "$AdminControl getNode" -host myhost.ibm.com -conntype soap -port 1107 -user <enteruserid> -password <enterpassword>
->Dmgr01
wsadmin -c "$AdminControl getHost" -host myhost.ibm.com -conntype soap -port 5112 -user <enteruserid> -password <enterpassword>
->myhost.ibm.com
wsadmin -c "$AdminControl getHost" -host myhost.ibm.com -conntype soap -port 1107 -user <enteruserid> -password <enterpassword>
->myhost.ibm.com

You will notice here the port numbers vary, most commands will be sent to the deployment manager soap port:

Now you have the thin client working and can connect to the remote WAS install and run commands lets tie it all together with ant.

Here is the rest of the ant file which calls the wsadmin.bat file in the thin client. Note the properties can be found above:
 <target name="updateWsAdmin">
   <exec executable="cmd">
     <arg value="/c"/>
     <arg value="C:\WASThinClient\wsadmin.bat"/>
     <arg value="-c"/>
    <arg value="$AdminApp install build/${earname}.ear { -update -appname ${appname} -MapWebModToVH {{${webAppDisplayName} ${appname}.war,WEB-INF/web.xml ${virtualHost}}} }"/>
    <arg value="-host"/>
    <arg value="${host}"/>
    <arg value="-conntype"/>
    <arg value="${conntype}"/>
    <arg value="-port"/>
    <arg value="${port}"/>
    <arg value="-user"/>
    <arg value="${user}"/>
    <arg value="-password"/>
    <arg value="${password}"/>
   </exec>
 </target>
  
 <target name="saveWsAdmin">
   <exec executable="cmd">
     <arg value="/c"/>
     <arg value="C:\WASThinClient\wsadmin.bat"/>
     <arg value="-c"/>
    <arg value="$AdminConfig save"/>
    <arg value="-host"/>
    <arg value="${host}"/>
    <arg value="-conntype"/>
    <arg value="${conntype}"/>
    <arg value="-port"/>
    <arg value="${port}"/>
    <arg value="-user"/>
    <arg value="${user}"/>
    <arg value="-password"/>
    <arg value="${password}"/>
   </exec>
 </target>
 
 <target name="startServerWsAdmin">
   <exec executable="cmd">
     <arg value="/c"/>
     <arg value="C:\WASThinClient\wsadmin.bat"/>
     <arg value="-c"/>
    <arg value="$AdminControl startServer ${server} ${node}"/>
    <arg value="-host"/>
    <arg value="${host}"/>
    <arg value="-conntype"/>
    <arg value="${conntype}"/>
    <arg value="-port"/>
    <arg value="${port}"/>
    <arg value="-user"/>
    <arg value="${user}"/>
    <arg value="-password"/>
    <arg value="${password}"/>
   </exec>
 </target>
 
 <target name="stopServerWsAdmin">
   <exec executable="cmd">
     <arg value="/c"/>
     <arg value="C:\WASThinClient\wsadmin.bat"/>
     <arg value="-c"/>
    <arg value="$AdminControl stopServer ${server} ${node}"/>
    <arg value="-host"/>
    <arg value="${host}"/>
    <arg value="-conntype"/>
    <arg value="${conntype}"/>
    <arg value="-port"/>
    <arg value="${port}"/>
    <arg value="-user"/>
    <arg value="${user}"/>
    <arg value="-password"/>
    <arg value="${password}"/>
   </exec>
 </target>
 
 <target name="deployApp" depends="updateWsAdmin,saveWsAdmin,stopServerWsAdmin,startServerWsAdmin"/>
Here is the full wasdeploy.xml if you need it. There is not too much to discuss about the file the main target which Jenkins should call is deployApp, this will perform an update (assumes the app is already installed), it will then save to the master configuration and bounce the application server. One interesting option here is MapWebModToVH this was needed as our application needs a particular virtual host but you may not need this option. The jacl script can also be written in jython and can be moved into a script as needed.

Here is a list of available options
  [wsadmin] MapModulesToServers
  [wsadmin] MapJaspiProvider
  [wsadmin] MapWebModToVH
  [wsadmin] CtxRootForWebMod
  [wsadmin] MapInitParamForServlet
  [wsadmin] MapSharedLibForMod
  [wsadmin] SharedLibRelationship
  [wsadmin] JSPCompileOptions
  [wsadmin] JSPReloadForWebMod
  [wsadmin] CustomActivationPlan
  [wsadmin] ModuleBuildID
  [wsadmin] GetServerName
  [wsadmin] preCompileJSPs
  [wsadmin] nopreCompileJSPs
  [wsadmin] distributeApp
  [wsadmin] nodistributeApp
  [wsadmin] useMetaDataFromBinary
  [wsadmin] nouseMetaDataFromBinary
  [wsadmin] deployejb
  [wsadmin] nodeployejb
  [wsadmin] createMBeansForResources
  [wsadmin] nocreateMBeansForResources
  [wsadmin] reloadEnabled
  [wsadmin] noreloadEnabled
  [wsadmin] deployws
  [wsadmin] nodeployws
  [wsadmin] processEmbeddedConfig
  [wsadmin] noprocessEmbeddedConfig
  [wsadmin] allowDispatchRemoteInclude
  [wsadmin] noallowDispatchRemoteInclude
  [wsadmin] allowServiceRemoteInclude
  [wsadmin] noallowServiceRemoteInclude
  [wsadmin] useAutoLink
  [wsadmin] nouseAutoLink
  [wsadmin] enableClientModule
  [wsadmin] noenableClientModule
  [wsadmin] validateSchema
  [wsadmin] novalidateSchema
  [wsadmin] usedefaultbindings
  [wsadmin] nousedefaultbindings
  [wsadmin] defaultbinding.force
  [wsadmin] allowPermInFilterPolicy
  [wsadmin] noallowPermInFilterPolicy
  [wsadmin] verbose
  [wsadmin] update
  [wsadmin] update.ignore.old
  [wsadmin] update.ignore.new
  [wsadmin] installed.ear.destination
  [wsadmin] appname
  [wsadmin] reloadInterval
  [wsadmin] validateinstall
  [wsadmin] filepermission
  [wsadmin] buildVersion
  [wsadmin] blaname
  [wsadmin] asyncRequestDispatchType
  [wsadmin] clientMode
  [wsadmin] deployejb.rmic
  [wsadmin] deployejb.dbtype
  [wsadmin] deployejb.dbschema
  [wsadmin] deployejb.classpath
  [wsadmin] deployejb.dbaccesstype
  [wsadmin] deployejb.sqljclasspath
  [wsadmin] deployejb.complianceLevel
  [wsadmin] deployws.classpath
  [wsadmin] deployws.jardirs
  [wsadmin] defaultbinding.datasource.jndi
  [wsadmin] defaultbinding.datasource.username
  [wsadmin] defaultbinding.datasource.password
  [wsadmin] defaultbinding.cf.jndi
  [wsadmin] defaultbinding.cf.resauth
  [wsadmin] defaultbinding.ejbjndi.prefix
  [wsadmin] defaultbinding.virtual.host
  [wsadmin] defaultbinding.strategy.file
  [wsadmin] target
  [wsadmin] server
  [wsadmin] cell
  [wsadmin] cluster
  [wsadmin] contextroot
  [wsadmin] custom

Some additional notes, if the wsadmin task is on the path (which is a good idea) you can then use <exec executable="wsadmin"> rather than using the cmd with the /c param, more info.

Inside the wsadmin.bat there is a few parms worth looking into wsadminConnType, wsadminPort, wsadminHost by using these you should be able to remove some arguments from the ant targets.

You may also be able to remove the hard coded credentials by editing the soap.client.props but I have not had time to test this.

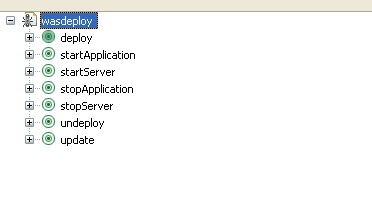
You can simply run the ant task in Eclipse by double clicking the target, no external tool are now needed:


Here is my example output for a full deploy:

  Buildfile: C:\...\wasdeploy.xml
updateWsAdmin:
     [exec] WASX7209I: Connected to process "dmgr" on node Dmgr01 using SOAP connector;  The type of process is: DeploymentManager
     [exec] ADMA5017I: Uninstallation of myapp started.
     [exec] ADMA5104I: The server index entry for WebSphere:cell=Cell01,node=AppSrv01 is updated successfully.
     [exec] ADMA5102I: The configuration data for myapp from the configuration repository is deleted successfully.
     [exec] ADMA5011I: The cleanup of the temp directory for application myapp is complete.
     [exec] ADMA5106I: Application myapp uninstalled successfully.
     [exec] ADMA5016I: Installation of myapp started.
     [exec] ADMA5058I: Application and module versions are validated with versions of deployment targets.
     [exec] ADMA5005I: The application myapp is configured in the WebSphere Application Server repository.
     [exec] ADMA5005I: The application myapp is configured in the WebSphere Application Server repository.
     [exec] ADMA5081I: The bootstrap address for client module is configured in the WebSphere Application Server repository.
     [exec] ADMA5053I: The library references for the installed optional package are created.
     [exec] ADMA5005I: The application myapp is configured in the WebSphere Application Server repository.
     [exec] ADMA5001I: The application binaries are saved in /opt/WebSphere/was80_AppServer/profiles/Dmgr01/wstemp/Script13ab83dd167/workspace/cells/Cell01/applications/myapp.ear/myapp.ear
     [exec] ADMA5005I: The application myapp is configured in the WebSphere Application Server repository.
     [exec] SECJ0400I: Successfully updated the application myapp with the appContextIDForSecurity information.
     [exec] ADMA5005I: The application myapp is configured in the WebSphere Application Server repository.
     [exec] ADMA5005I: The application myapp is configured in the WebSphere Application Server repository.
     [exec] ADMA5113I: Activation plan created successfully.
     [exec] ADMA5011I: The cleanup of the temp directory for application myapp is complete.
     [exec] ADMA5013I: Application myapp installed successfully.
saveWsAdmin:
     [exec] WASX7209I: Connected to process "dmgr" on node Dmgr01 using SOAP connector;  The type of process is: DeploymentManager
stopServerWsAdmin:
     [exec] WASX7209I: Connected to process "dmgr" on node Dmgr01 using SOAP connector;  The type of process is: DeploymentManager
     [exec] WASX7337I: Invoked stop for server "server1" on node "AppSrv01"; Waiting for stop completion.
     [exec] WASX7264I: Stop completed for server "server1" on node "AppSrv01"
startServerWsAdmin:
     [exec] WASX7209I: Connected to process "dmgr" on node Dmgr01 using SOAP connector;  The type of process is: DeploymentManager
     [exec] WASX7262I: Start completed for server "server1" on node "AppSrv01"
deployApp:
BUILD SUCCESSFUL
Total time: 3 minutes 6 seconds

References:

Tuesday, October 30, 2012

Running Selenium Grid as a Service

If you have started running you Selenium suite in parallel or in a distributed environment you're probably using the Selenium Grid2. Now you don't want the console window open with the hub and node running on your build server so you'll want to wrap it and run it as a service.

To do this I've used the Java Service Wrapper around the selenium-server-standalone-2.25.0.jar, the documentation is pretty solid. I used the 4th method listed on the site, Method 4 - WrapperJarApp Integration.

If you follow the instructions you should end up with a directory structure like this:
----HubService
|   ----bin
|   |       InstallSeleniumHub.bat
|   |       SeleniumHub.bat
|   |       UninstallSeleniumHub.bat
|   |       wrapper.exe
|   |       
|   ----conf
|   |       wrapper.conf
|   |       
|   ----lib
|   |       selenium-server-standalone-2.25.0.jar
|   |       wrapper.dll
|   |       wrapper.jar
|   |       
|   ----logs
|           wrapper.log
|              
----NodeService
   ----bin
   |       InstallSeleniumNode.bat
   |       SeleniumNode.bat
   |       UninstallSeleniumNode.bat
   |       wrapper.exe
   |       
   ----conf
   |       wrapper.conf
   |       
   ----lib
   |       selenium-server-standalone-2.25.0.jar
   |       wrapper.dll
   |       wrapper.jar
   |       
   ----logs
           wrapper.log
The only real work is inside the wrapper.conf partially shown below:

HubService - partial wrapper.conf:

#********************************************************************
# Wrapper Java Properties
#********************************************************************
# Java Application
#  Locate the java binary on the system PATH:
wrapper.java.command=java
#  Specify a specific java binary:
#set.JAVA_HOME=/java/path
#wrapper.java.command=%JAVA_HOME%/bin/java

# Tell the Wrapper to log the full generated Java command line.
#wrapper.java.command.loglevel=INFO

# Java Main class.  This class must implement the WrapperListener interface
#  or guarantee that the WrapperManager class is initialized.  Helper
#  classes are provided to do this for you.  See the Integration section
#  of the documentation for details.
wrapper.java.mainclass=org.tanukisoftware.wrapper.WrapperJarApp

# Java Classpath (include wrapper.jar)  Add class path elements as
#  needed starting from 1
wrapper.java.classpath.1=../lib/wrapper.jar
wrapper.java.classpath.2=../lib/selenium-server-standalone-2.25.0.jar

# Java Library Path (location of Wrapper.DLL or libwrapper.so)
wrapper.java.library.path.1=../lib

# Java Bits.  On applicable platforms, tells the JVM to run in 32 or 64-bit mode.
wrapper.java.additional.auto_bits=TRUE

# Java Additional Parameters
#wrapper.java.additional.1=

# Initial Java Heap Size (in MB)
#wrapper.java.initmemory=3

# Maximum Java Heap Size (in MB)
#wrapper.java.maxmemory=64

# Application parameters.  Add parameters as needed starting from 1
wrapper.app.parameter.1=../lib/selenium-server-standalone-2.25.0.jar
wrapper.app.parameter.2=-role
wrapper.app.parameter.3=hub
Here are the full conf files, remember to rename to wrapper.conf:
Hub wrapper.com
Node wrapper.com

Now you should first run the SeleniumHub.bat to test the wrapper in a console window. If that is successful you can then run InstallSeleniumHub.bat and InstallSeleniumNode.bat to register the services.

The service will still not be running until you start it as follows:
Start -> Run -> services.msc


This should be all you need to do.

Thursday, October 18, 2012

Running Selenium Testing in Parallel with JUnit

Recently I have been asked to speed up our Selenium regression test suite (currently at 2 hours) by running tests in parallel. We are using Jenkins to kick off the ant task that will run the test suite that is configured in Junit.

There are 2 parts to getting this to work:
  •         The Selenium Grid2 Hub & Node
  •         Junit's parallel thread process

As usual my first task is to get a prototype running locally. I started by reading the Selenium Grid2 documentation which is pretty solid.

I downloaded the selenium-server-standalone-2.25.0.jar and set up a couple of bat scripts to start the grid.
  •     startHub.bat
    java -jar selenium-server-standalone-2.25.0.jar -role hub
  •     startNode.bat
    java -jar selenium-server-standalone-2.25.0.jar -role node  -hub http://localhost:4444/grid/register -browser browserName=firefox,maxInstances=5 -browser "browserName=internet explorer,maxInstances=5" -maxSession 5

Place these in the dir with the jar, run the hub, run the node and you should be ready to rock. The console can be viewed at: http://localhost:4444/grid/console


Lets look at the code required to send the tests to the grid using the remote web driver. For completeness I've also included the code for setting up a proxy server and a regular web driver if the hub is not running.

 /**
     * Returns an instance of the configured remote web driver pointing to a local web hub on port 4444
     *
     * This is for use in stage. If the hub is not running a regular web driver is returned
     *
     * @return WebDriver hub
     */
    private WebDriver getWebDriver() throws UnknownHostException {
        try {
            return new RemoteWebDriver(new URL("http://localhost:4444/wd/hub"), getDesiredCapabilities());
        //if the remote selenium hub is unavailable return a regular web driver
        } catch (MalformedURLException e) {
            return getLocalWebDriver();
        } catch (UnreachableBrowserException e) {
            return getLocalWebDriver();
        }
    }
  
    /**
     * Returns an instance of the configured web driver.
     *
     * This is for local testing
     *
     * @return WebDriver
     */
    private WebDriver getLocalWebDriver() throws UnknownHostException {
        if (useFirefox()) {
            return new FirefoxDriver(getDesiredCapabilities());
        } else {
            return new InternetExplorerDriver(getDesiredCapabilities());
        }
    }
  
    /**
     * Returns a DesiredCapabilities for either IE or Firefox.
     *
     * @return DesiredCapabilities for either IE or Firefox
     * @throws UnknownHostException
     */
    private DesiredCapabilities getDesiredCapabilities() throws UnknownHostException {
        if (useFirefox()) { //firefox
            DesiredCapabilities dc = DesiredCapabilities.firefox();
            FirefoxProfile profile = new FirefoxProfile();
            if (useProxy())
                dc.setCapability(CapabilityType.PROXY, getSeleniumProxy());
            if (getLocale() != null)
                profile.setPreference("intl.accept_languages", getLocale().toString());
            dc.setCapability(FirefoxDriver.PROFILE, profile);
            return dc;
        } else { //internet explorer
            DesiredCapabilities dc = DesiredCapabilities.internetExplorer();
            if (useProxy())
                dc.setCapability(CapabilityType.PROXY, getSeleniumProxy());
            return dc;
        }
    }
  
    /**
     * This will return a Selenium configured proxy pointing to a local proxy
     * on port 6666
     *
     * @param server
     * @return
     * @throws UnknownHostException
     */
    private Proxy getSeleniumProxy() throws UnknownHostException {
        Proxy proxy = new Proxy();
        proxy.setProxyType(Proxy.ProxyType.MANUAL);
        String proxyStr = String.format("%s:%d", InetAddress.getLocalHost().getCanonicalHostName(), proxyPort);
        proxy.setHttpProxy(proxyStr);
        proxy.setSslProxy(proxyStr);
        proxy.setNoProxy("someaddress");
        return proxy;
    }

The next step is to set up our build.xml ant task to kick of the tests in parallel.

Thanks to code cop I've come up with this partial build.xml:
    <target name="run-tests-dev-parallel4" depends="compile">
      <parallel threadcount="4">
        <antcall target="-junitThread">
          <param name="junit.division.total" value="4" />
          <param name="junit.division.num" value="1" />
        </antcall>
        <antcall target="-junitThread">
          <param name="junit.division.total" value="4" />
          <param name="junit.division.num" value="2" />
        </antcall>
        <antcall target="-junitThread">
          <param name="junit.division.total" value="4" />
          <param name="junit.division.num" value="3" />
        </antcall>
        <antcall target="-junitThread">
          <param name="junit.division.total" value="4" />
          <param name="junit.division.num" value="4" />
        </antcall>
      </parallel>
    </target>
   
    <target name="run-tests-dev-parallel8" depends="compile">
      <parallel threadcount="8">
        <antcall target="-junitThread">
          <param name="junit.division.total" value="8" />
          <param name="junit.division.num" value="1" />
        </antcall>
        <antcall target="-junitThread">
          <param name="junit.division.total" value="8" />
          <param name="junit.division.num" value="2" />
        </antcall>
        <antcall target="-junitThread">
          <param name="junit.division.total" value="8" />
          <param name="junit.division.num" value="3" />
        </antcall>
        <antcall target="-junitThread">
          <param name="junit.division.total" value="8" />
          <param name="junit.division.num" value="4" />
        </antcall>
        <antcall target="-junitThread">
          <param name="junit.division.total" value="8" />
          <param name="junit.division.num" value="5" />
        </antcall>
        <antcall target="-junitThread">
          <param name="junit.division.total" value="8" />
          <param name="junit.division.num" value="6" />
        </antcall>
        <antcall target="-junitThread">
          <param name="junit.division.total" value="8" />
          <param name="junit.division.num" value="7" />
        </antcall>
        <antcall target="-junitThread">
          <param name="junit.division.total" value="8" />
          <param name="junit.division.num" value="8" />
        </antcall>
      </parallel>
    </target>
   
    <target name="-junitThread">
        <echo message="started thread ${junit.division.num} of ${junit.division.total}" />
        <junit fork="true" forkmode="perBatch" printsummary="on" haltonfailure="false" failureproperty="tests.failed" showoutput="true">
        <classpath refid="dev-classpath" />
        <formatter type="xml" />        
        <batchtest todir="${dev.test.results.dir}">
            <fileset dir="${dev.bin.dir}">
                <include name="**/*Test.class" />
                <custom classname="fully.qualified.DividingSelector" classpath="bin">
                  <param name="divisor" value="${junit.division.total}" />
                  <param name="part" value="${junit.division.num}" />
                </custom>
            </fileset>
        </batchtest>
      </junit>
      <echo message="ended thread ${junit.division.num} of ${junit.division.total}" />
      <fail if="tests.failed">
                        tests.failed=${tests.failed}
                        ***********************************************************
                        ***********************************************************
                        ****  One or more tests failed!  Check the output ...  ****
                        ***********************************************************
                        ***********************************************************
       </fail>
    </target>

The DividingSelector.java is as follows:
import java.io.File;

import org.apache.tools.ant.BuildException;
import org.apache.tools.ant.types.Parameter;
import org.apache.tools.ant.types.selectors.BaseExtendSelector;

/**
 * Split a fileset into the given number of parts.
 *
 */
public final class DividingSelector extends BaseExtendSelector {
   
    /**
     * The num of the current test class we are processing, 1 to totalTests
     */
    private int testNum;

    /**
     * Number of total threads to divide the tests between, 1 to totalThreads
     */
    private int totalThreads;

    /**
     * Current thread to run a test
     */
    private int curThread;

    public void setParameters(Parameter[] pParameters) {
        super.setParameters(pParameters);
        for (int j = 0; j < pParameters.length; j++) {
            Parameter p = pParameters[j];
            if ("divisor".equalsIgnoreCase(p.getName())) {
                totalThreads = Integer.parseInt(p.getValue());
            } else if ("part".equalsIgnoreCase(p.getName())) {
                curThread = Integer.parseInt(p.getValue());
            } else {
                throw new BuildException("unsupported parameter " + p.getName() + " with value " + p.getValue());
            }
        }
    }

    public void verifySettings() {
        super.verifySettings();
        if (totalThreads <= 0 || curThread <= 0) {
            throw new BuildException("parameter part or divisor not set");
        }
        if (curThread > totalThreads) {
            throw new BuildException("parameter part must be <= divisor");
        }
    }

    public boolean isSelected(File pBaseDir, String pRelative, File pFullPath) {
        //increment the test counter
        testNum++;
       
        //this is the thread that will run the current test
        int threadNum = testNum % totalThreads + 1;
        boolean result = threadNum == curThread;
           
        if (result)
            System.out.println("thread: " + curThread + " ,running: " + pRelative + " , testnum: " + testNum);

        return result;
    }

}

Once you have the targets working you can configure it in Jenkins to run the run-tests-dev-parallel8 or run-tests-dev-parallel4 target depending on what works better for your build server.


When you run the build you'll see in the console output junit spawning the 8 threads and sending them to the hub, the hub will then handle the distribution to the nodes running the actual tests.

run-tests-dev-parallel8:

-junitThread:
     [echo] started thread 6 of 8

-junitThread:
     [echo] started thread 7 of 8

-junitThread:
     [echo] started thread 5 of 8

-junitThread:
     [echo] started thread 1 of 8

-junitThread:
     [echo] started thread 8 of 8

-junitThread:
     [echo] started thread 2 of 8

-junitThread:
     [echo] started thread 3 of 8

-junitThread:
     [echo] started thread 4 of 8

It will then pre divide the tests between the threads and will printout which thread has been allocated to which test. This can cause problems of a long running thread which is left after everything else is finished. This can be build into the DividingSelector but in not a prefect solution.

Next we will look at running the hub and node as a windows service on the build server.

References:

http://blog.code-cop.org/2009/09/parallel-junit.html


Automating Websphere Deploy

Last couple of days I've been investigating automating our application deployments to Websphere Application Server 8 (WAS). With little WAS administration experience the learning curve was steep, and documentation was outdated most often for WAS 6, it seemed there were two ways to go using wsadmin with jython which seemed overly complex for my purposes and ws_ant which it the direction I choose.

First I needed to get a prototype working locally as I had no access to the dev server hosting our application. So I installed the 60 day WAS 8.5 trial on my machine. Even this was no easy task, the deafult is to try and download with the 'Download Director' well this didn't work so well with my proxy settings and crashed several times. I then found the second tab 'Download using http'. I also installed the IBM Installation Manager. Once the 3GB package was downloaded I unzipped them into a directory.


Next I fired up the Installation Manager, the first problem I had was this message:


Installation Manager cannot find any packages to install. In order to access packages you must configure a repository connection and ensure that you can access the network or your repository media.

I clicked the repositories link and the 'Add Reposiroty...' I didn't know exactly what this was looking for but pointing it to the unzipped WAS 8 directory file 'repository.config' seemed to do the trick. Following the prompts I soon had WAS 8.5 installed on my machine.


Next I started to get as much information about ws_ant as I could. I came up with the following ant script. Initially I added the targets to our usual build.xml but this didn't work so well, I'd reccommend you keep them seperate so I added a wasdeploy.xml with the following:
wasdeploy.xml
<?xml version="1.0"?>
<!DOCTYPE project>
<project name="wasdeploy" basedir=".">

    <!-- Project properties -->
    <property name="name" value="myapplication" />
    <property name="build.dir" location="build" />

    <!-- was properties -->
    <property name="hostName" value="localhost" />
    <property name="connType" value="SOAP" />
    <property name="connPort" value="8880" />
    <property name="userId" value="wasadmin" />
    <property name="password" value="wasadmin" />
    <property name="wasHome.dir" value="C:/Program Files/IBM/WebSphere/AppServer" />
    <property name="node" value="Node01" />
    <property name="server" value="server1" />

    <!-- Was Ant task definitions -->
    <taskdef name="wsStartApplication" classname="com.ibm.websphere.ant.tasks.StartApplication" />
    <taskdef name="wsStopApplication" classname="com.ibm.websphere.ant.tasks.StopApplication" />
    <taskdef name="wsStartServer" classname="com.ibm.websphere.ant.tasks.StartServer" />
    <taskdef name="wsStopServer" classname="com.ibm.websphere.ant.tasks.StopServer" />
    <taskdef name="wsInstallApp" classname="com.ibm.websphere.ant.tasks.InstallApplication" />
    <taskdef name="wsUninstallApp" classname="com.ibm.websphere.ant.tasks.UninstallApplication" />
    <taskdef name="wsListApps" classname="com.ibm.websphere.ant.tasks.ListApplications" />

    <!--
    other helpful properties
    wasHome="${wasHome.dir}"
    conntype="${connType}"
    port="${port}"
    host="${hostName}" ip address or remote was
    user="${userId}"
    password="${password}"
    -->

    <target name="listApps">
 <wsListApps />
    </target>

    <target name="deploy" description="Deploy the ear">
        <wsInstallApp ear="${build.dir}/${name}.ear" options="-appname ${name}" failonerror="true"/>
    </target>

    <target name="undeploy">
        <wsUninstallApp application="${name}" failonerror="true" />
    </target>

    <target name="startApplication">
        <wsStartApplication application="${name}" wasHome="${wasHome.dir}" server="${server}" node="${node}"/>
    </target>

    <target name="stopApplication">
        <wsStopApplication application="${name}" wasHome="${wasHome.dir}" server="${server}" node="${node}"/>
    </target>

    <target name="update" >
        <wsInstallApp ear="${build.dir}/${name}-qa.ear" options="-appname ${name} -update" failonerror="true"/> 
    </target>
   
    <target name="startServer">
        <wsStartServer server="${server}"
                       logFile="${build.dir}/start.log"
                       trace="false"
                       failonerror="false" />
    </target>

    <target name="stopServer">
        <wsStopServer server="${server}"
                      logFile="${build.dir}/stop.log"
                      trace="false"
                      failonerror="false" />
    </target>

</project>
The script is pretty self explanatory, it contains 8 targets, one for each taskdef as well as an update target. I also added the listApps as a simple sanity check as it has no arguments and will not update anything.

Note there is no username/password needed as I turned off security for my local install, but this is easy to add as shown in comments. Things like the connection type and port don't seem to be needed locally but will probably be used for remote deploy.

Some helpful tips:
  • WAS_HOME\profiles\AppSrv01\properties\wsadmin.properties - this will contain the scripting connection properties such as Soap over port 8880
  •  I found a lot of people talking about an outdated wsanttasks.jar containing the taskdef classes but these are now found in:WAS_HOME\plugins\com.ibm.ws.runtime.jar
  • The admin console can be found at:  http://localhost:9060/ibm/console/ (the WC_adminhost port)
  • The application can be found at: http://localhost:9080/myapplication (the WC_defaulthost port)
  • The deploy target will not start the application.
Running these ant tasks using ws_ant.bat is the next part.

I created some tools in Eclipse to call them using the 'External Tools Configurations' under the run menu.

The Location points to the ws_ant.bat script in WAS_HOME\profiles\AppSrv01\bin


Here the arguments simply specify the ant xml file and the last argument is the target.

This is the output you can expect from a successful deploy:

Buildfile: wasdeploy.xml

deploy:
[wsInstallApp] Installing Application [C:\svnroot\java\web\myapplication\branches\develop\build\myapplication.ear]...
  [wsadmin] WASX7209I: Connected to process "server1" on node Node01 using SOAP connector;  The type of process is: UnManagedProcess
  [wsadmin] ADMA5016I: Installation of myapplication started.
  [wsadmin] ADMA5058I: Application and module versions are validated with versions of deployment targets.
  [wsadmin] ADMA5005I: The application myapplication is configured in the WebSphere Application Server repository.
  [wsadmin] ADMA5005I: The application myapplication is configured in the WebSphere Application Server repository.
  [wsadmin] ADMA5081I: The bootstrap address for client module is configured in the WebSphere Application Server repository.
  [wsadmin] ADMA5053I: The library references for the installed optional package are created.
  [wsadmin] ADMA5005I: The application myapplication is configured in the WebSphere Application Server repository.
  [wsadmin] ADMA5001I: The application binaries are saved in C:\Program Files\IBM\WebSphere\AppServer\profiles\AppSrv01\wstemp\Script13a751c1a27\workspace\cells\Node01Cell\applications\myapplication.ear\myapplication.ear
  [wsadmin] ADMA5005I: The application myapplication is configured in the WebSphere Application Server repository.
  [wsadmin] SECJ0400I: Successfully updated the application myapplication with the appContextIDForSecurity information.
  [wsadmin] ADMA5005I: The application myapplication is configured in the WebSphere Application Server repository.
  [wsadmin] ADMA5005I: The application myapplication is configured in the WebSphere Application Server repository.
  [wsadmin] ADMA5113I: Activation plan created successfully.
  [wsadmin] ADMA5011I: The cleanup of the temp directory for application myapplication is complete.
  [wsadmin] ADMA5013I: Application myapplication installed successfully.
  [wsInstallApp] Installed Application [C:\svnroot\java\web\myapplication\branches\develop\build\myapplication.ear]

BUILD SUCCESSFUL
Total time: 2 minutes 16 seconds


Part 2 of this will be running the ant task with Jenkins on a build server and deploying to a remote server hosting the application.

References: